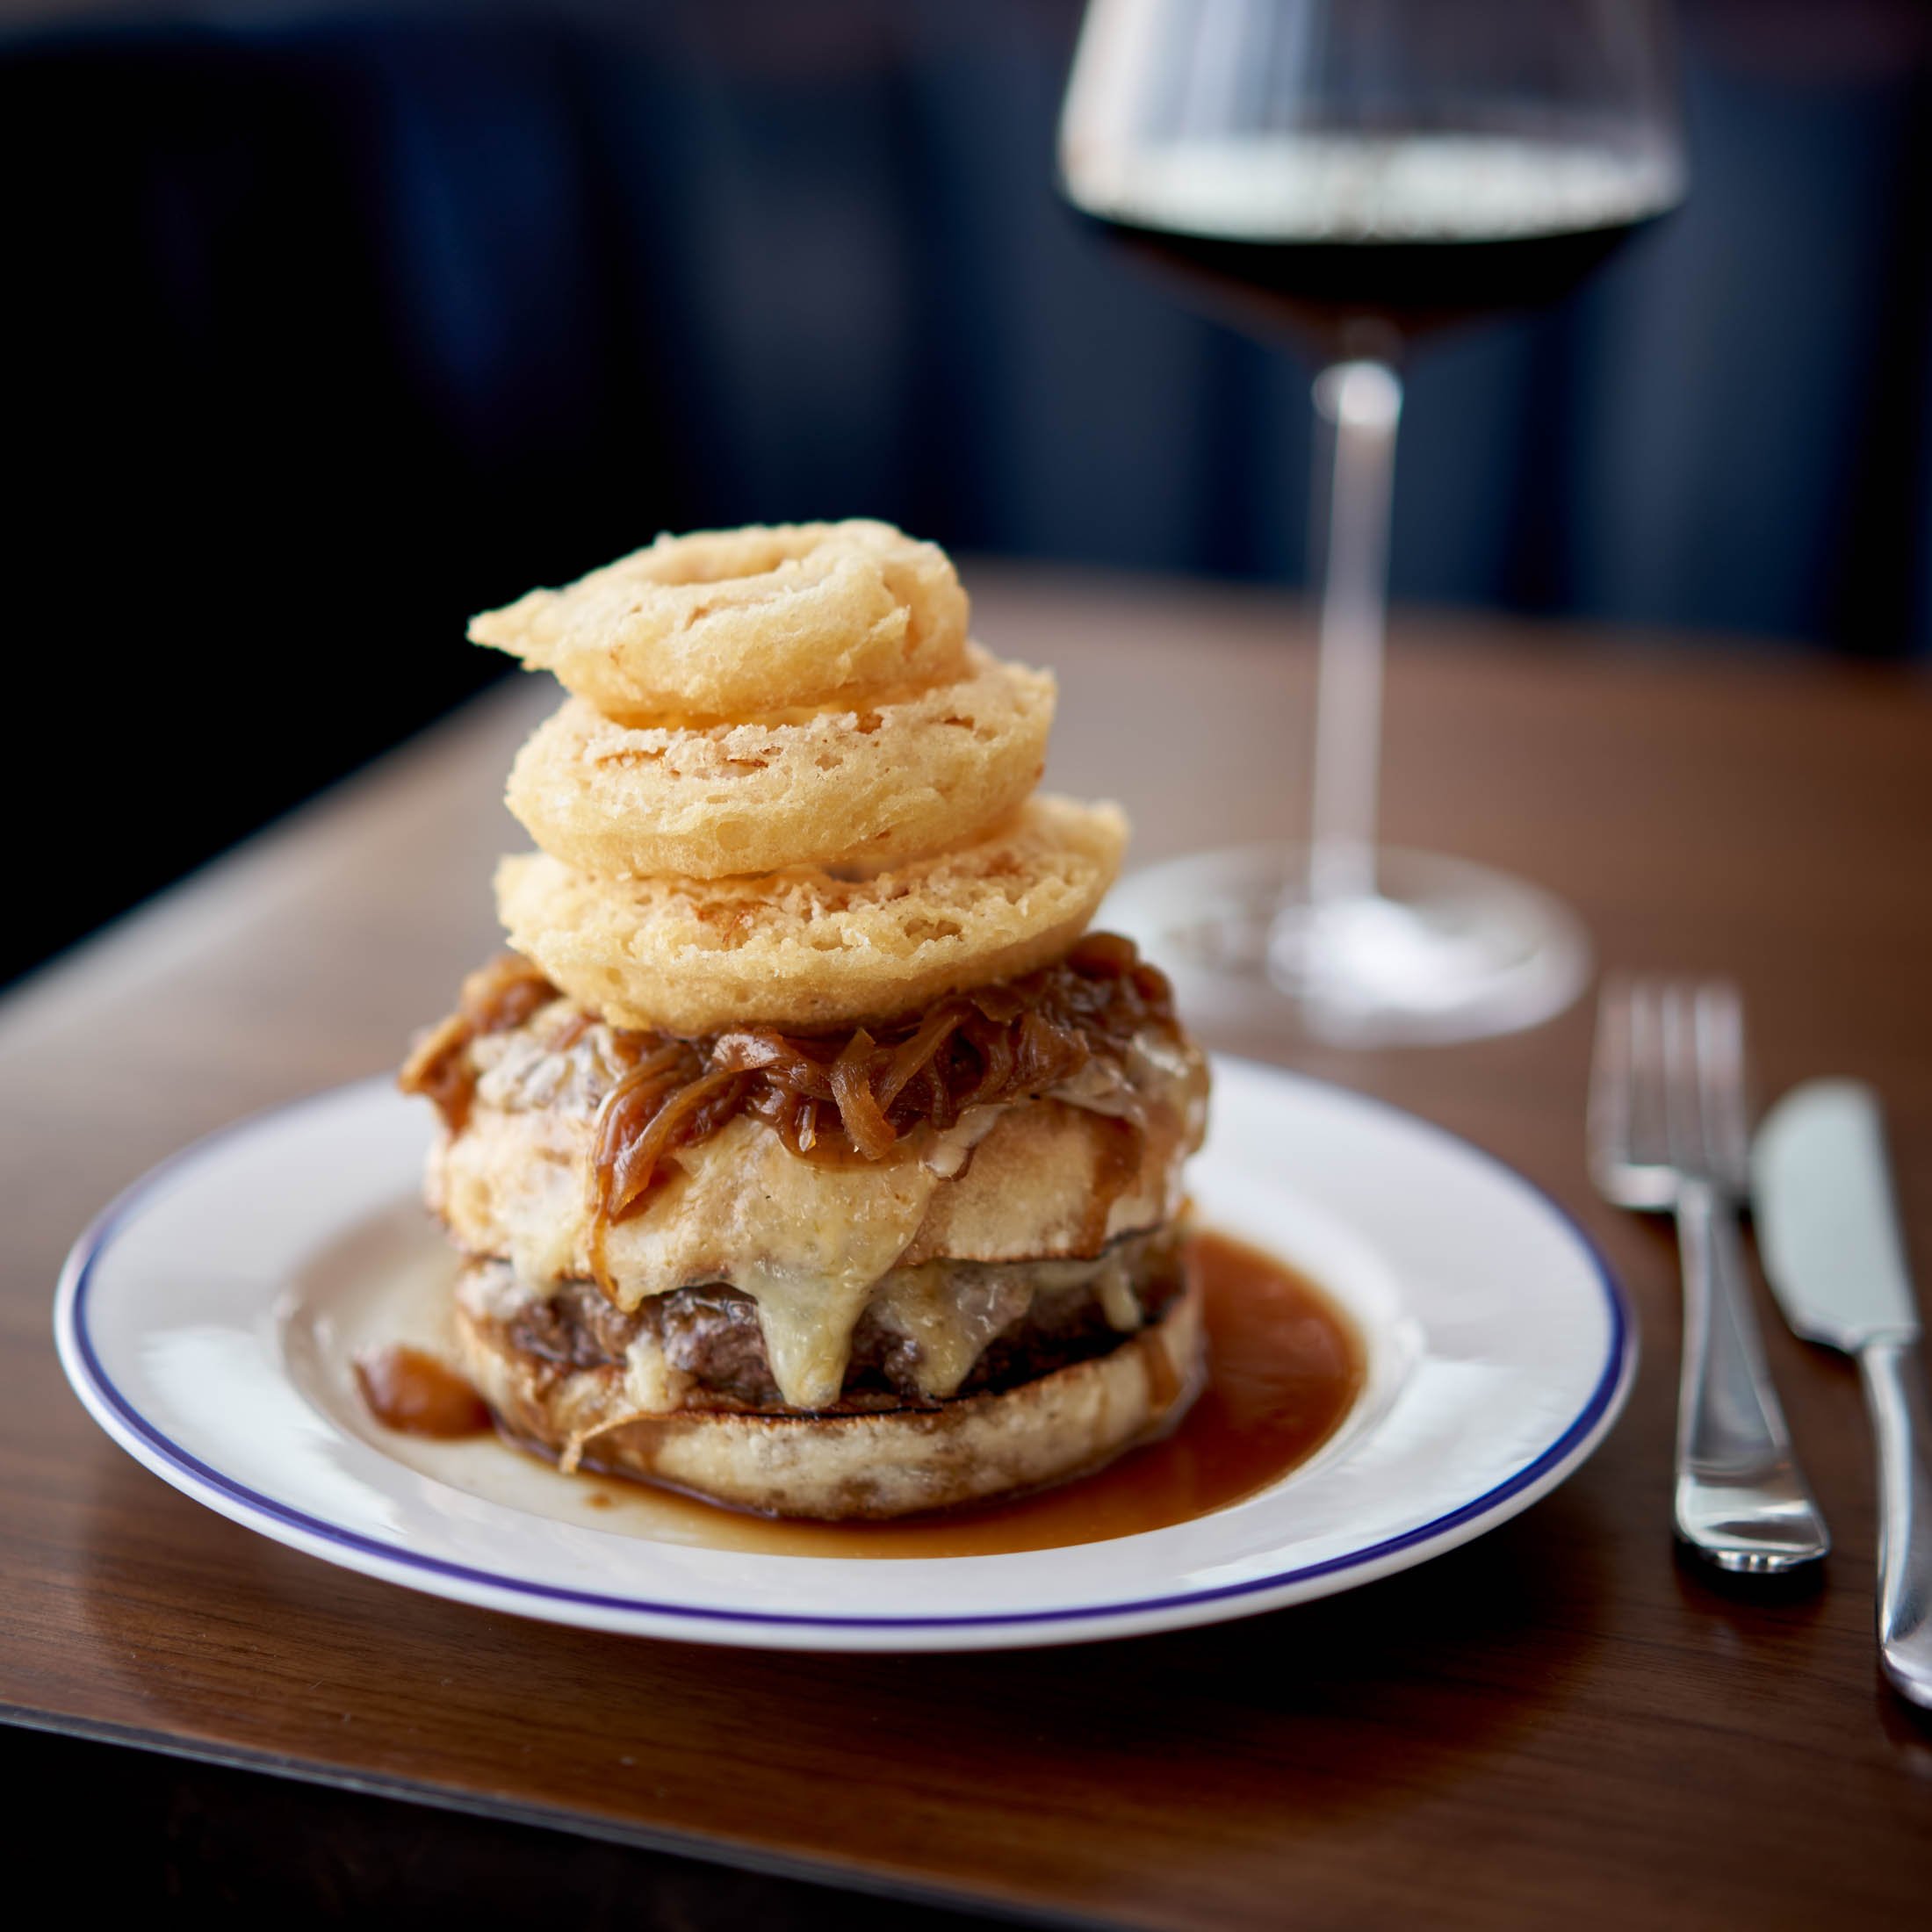
When it comes to selecting a food photographer for your restaurant, reviewing their portfolios is a crucial step in the decision-making process. A portfolio not only showcases a photographer's skills and expertise but also gives you a glimpse into their artistic style and ability to capture the essence of different cuisines. In this blog post, I'll guide you through the process of reviewing portfolios effectively, helping you find the perfect food photographer who can bring your culinary creations to life through captivating visuals.
Finding the Right Professional Food Photographer - Part 2
Congratulations! You've done your research and have a shortlist of three potential food photographers for your restaurant. Now comes the exciting part: narrowing down your selection and finding the perfect match. In this blog post, we'll walk you through the best practices for making your final decision, including key questions to ask and things to consider. Let's dive in!
Finding the Right Professional Food Photographer - Part 1
Pricing for Professional Food Photography (for Restaurant Owners)
Can a Smartphone Be Better Than a Professional Camera? Really?
The Most Common Food Photography Question
What’s the best camera for Food Photography?
ME: What’s your goal? What do you want to achieve with the camera you’re willing to buy? (Don’t you hate it when people answer a question with another question, let alone two questions? 🤣).
THEM: I want to take great food images.
ME: Do you know the fundamentals of Food Photography?
THEM: I guess….maybe… I’m not sure and that’s why I need a camera that takes great images.
ME: Are you aware of the fact that the camera alone will not guarantee great images, no matter how advanced, fantastic and expensive that is?
THEM: Oh, no, I just thought a great camera is what I needed to get started in food photography.
ME: Have you considered learning the fundamentals before investing a ton of money and time into a camera system?
THEM: What do you mean?
ME: That you can start learning the fundamentals of Food Photography right this second. In fact, I’m pretty confident you own a smartphone and that is not older than 3 years. So, you do have a camera already.
THEM: Really?
ME: Yes, really. Unless you know how to light and compose a food image, an expensive and complicated camera will not bring any tangible benefits. On the contrary, it can be a huge source of frustration because you might be expecting great food images from the very first moment you start shooting with it and that is very unlikely to happen, unless you know lighting.
Look at this image, do you find it beautiful? Do you find it pleasant to look at?
THEM: Not really.
ME: I agree, it’s horrible. Yet it was shot on a $5500 Sony pro system. You see where I’m going with this?
THEM: Wow.
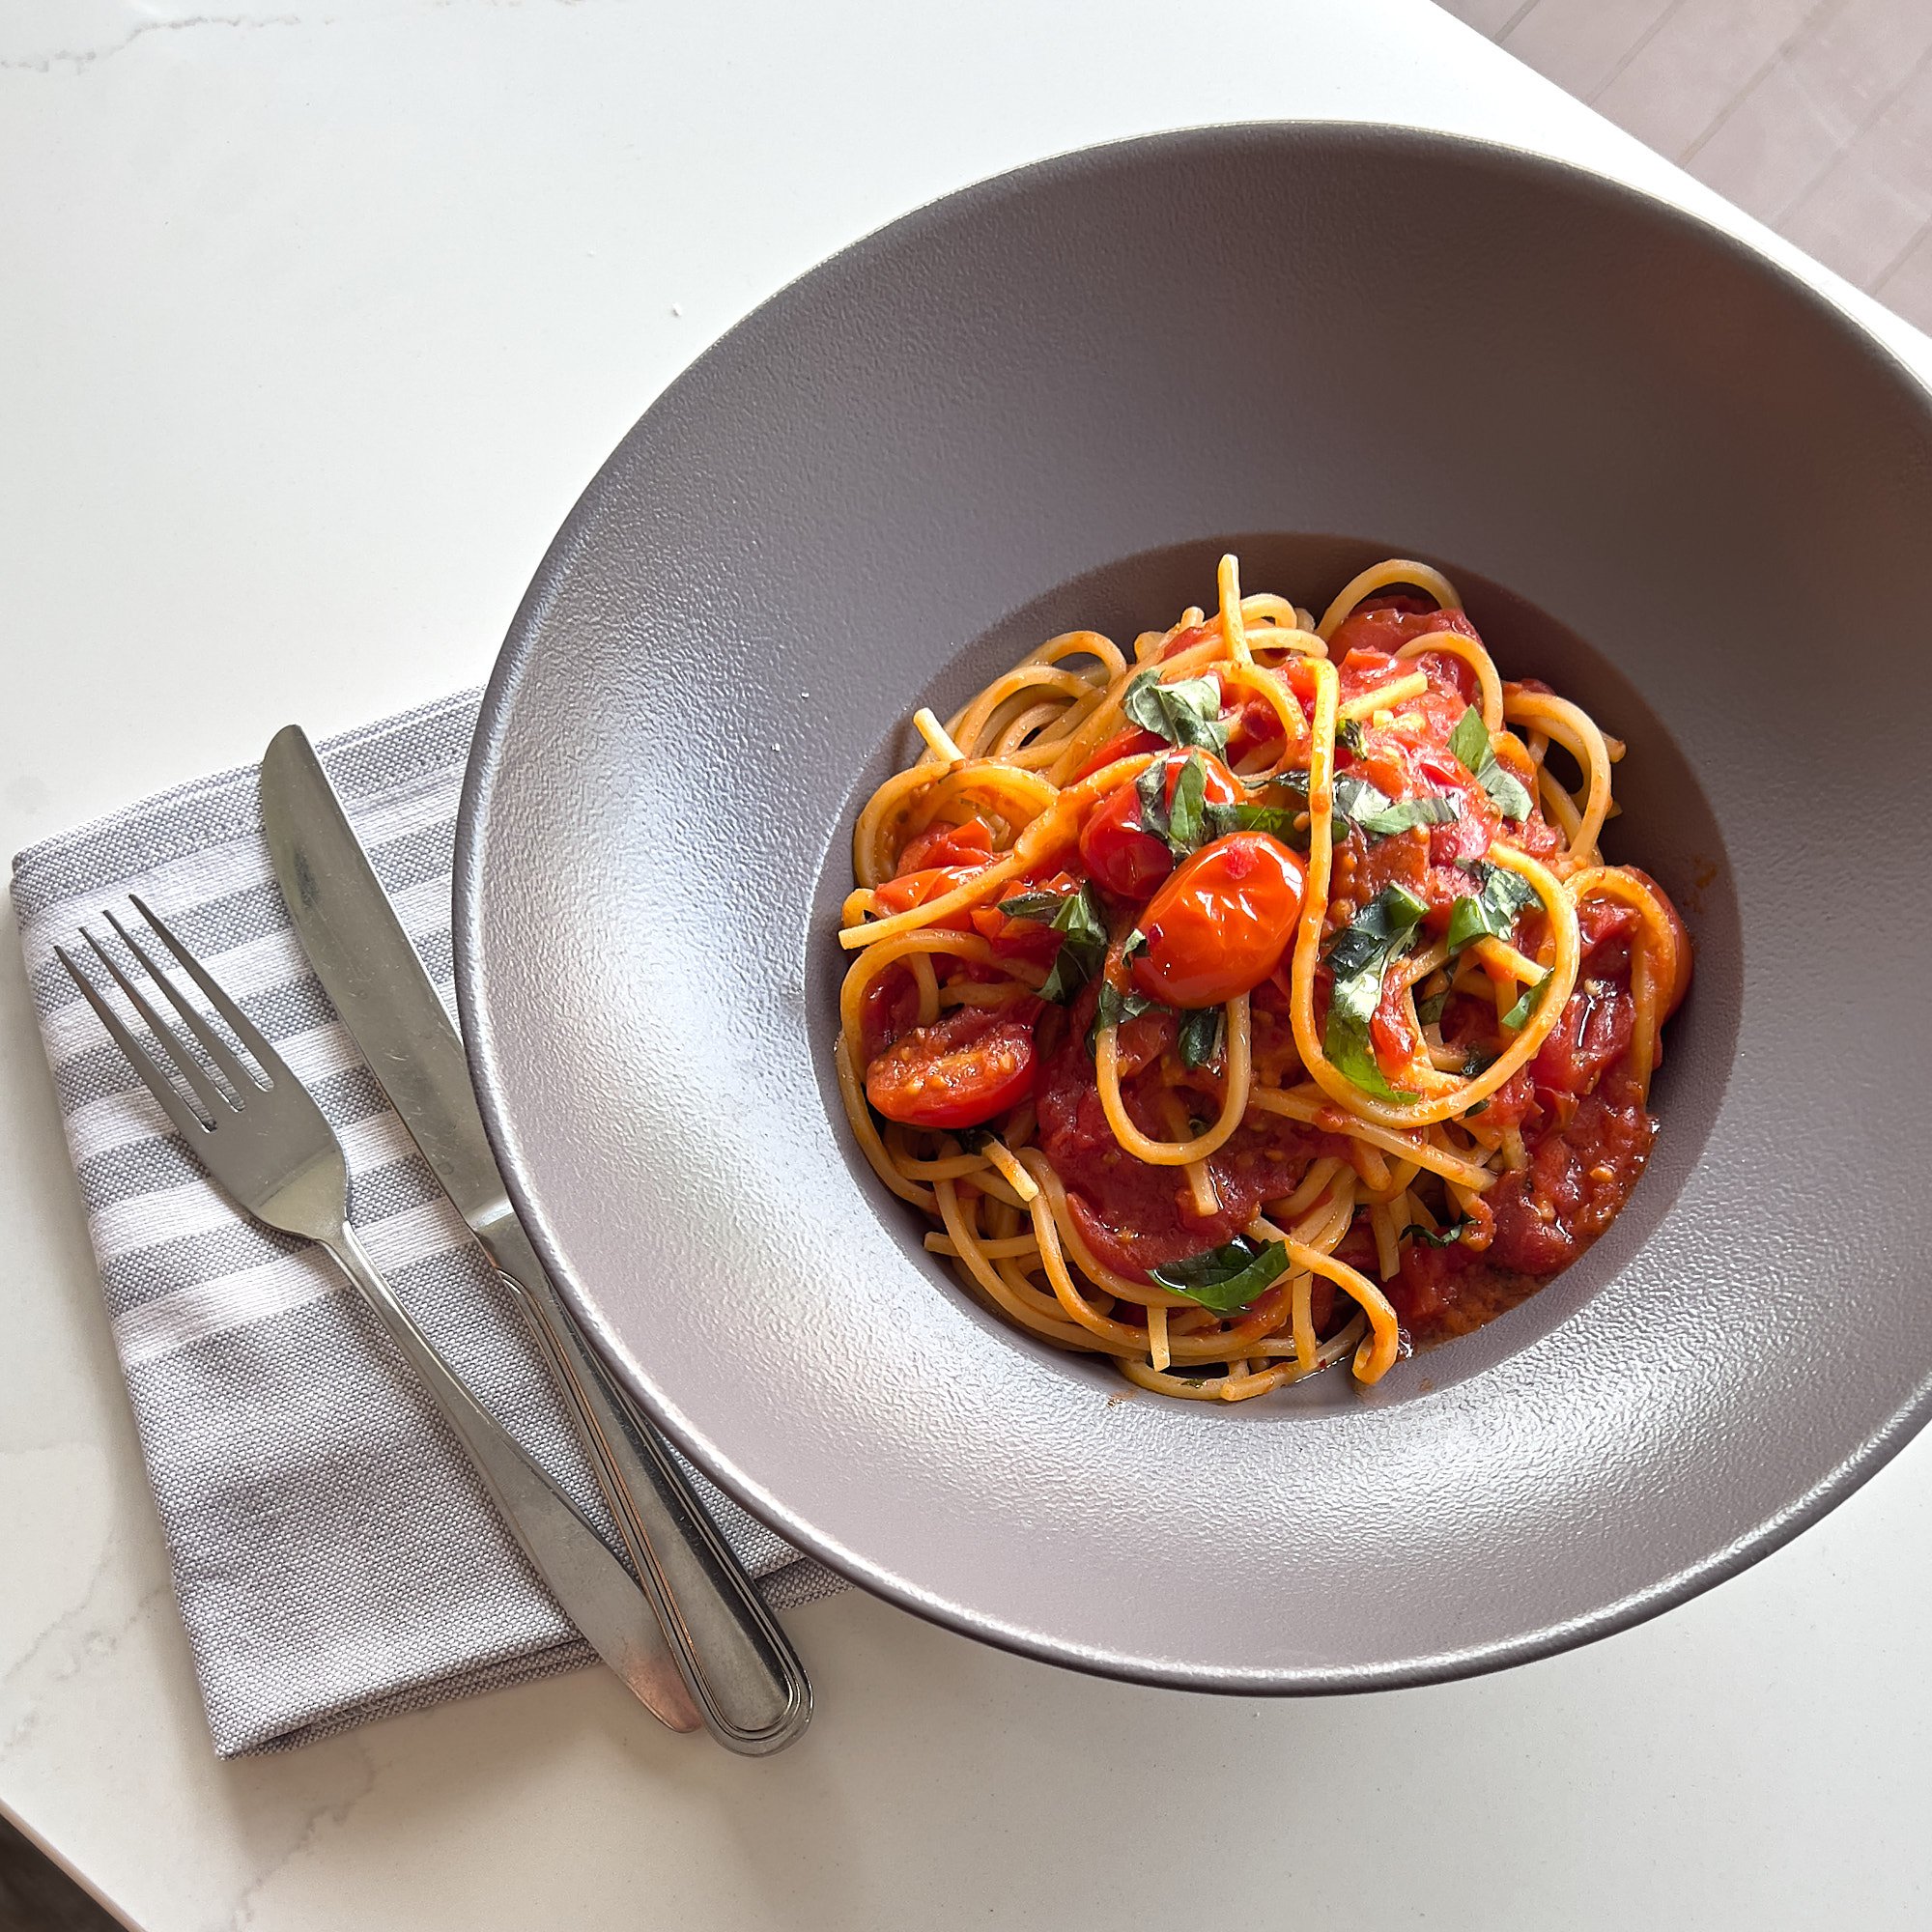
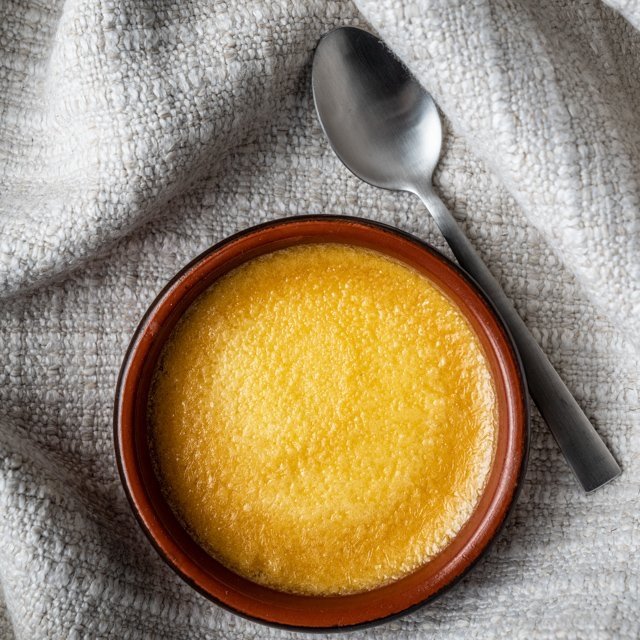
ME: Now take a look at these images.
ME: Pretty nice, right? Well, they were shot on an iPhone.
THEM: Really? But that’s probably because you know what you are doing.
ME: Bingo! You FIRST need to know what you’re doing, then you can worry about the camera. Your first worry needs to be to learn lighting!
THEM: How do I learn about lighting?
ME: YouTube ‘University’ of course! 🤣 I’m not kidding, there’s more free content on Food Photography online than anyone can ever consume! And you might consider enrolling in one or several courses in order to speed up the learning. Yes, it normally takes a lot longer to learn things through free content, because that content happens to be scattered around across so many sources, hardly an efficient way to learn. I happen to have designed a great and compact course on the subject, but I think you should still explore your free options first and see if those works for you.
Just remember: your goal is to first learn lighting.
THEM: But what if I still want to start from the camera?
ME: Be my guest, nothing wrong with that, of course! As long as you are aware that the camera by itself is not enough to take great food images. Tell me what your budget is and I’ll be glad to point you in the right direction.
At this point the conversations can go on for quite a while as there’s no shortage of options when it comes to gear for food photography. On the bright side, it’s really hard to go wrong when it comes to the actual camera body, the quality is extremely high even for the low-end options. Lenses are a totally different story on the other hand and they can really make a difference. For that reason, I strongly encourage you to focus on the lenses (the good ones will last you a lifetime) and NOT on the camera body (you will upgrade it several times throughout the years).
My answer to the question above
Put as much of your budget as possible on the lense(s) and as little as possible on the camera body. Pretty much any brand will do.
Do you need more help with food photography?
Join my free newsletter and/or enroll in my Smartphone Food Photography course.
May the right light be with you! ☀️📷😀
Your Camera Is Not THE Problem
Lighting is BY FAR, the most important one of them and, if you’re just starting out, the camera you’re using is the least important one. If lighting is not great, it doesn’t matter how great your composition is, it doesn’t matter how good you are with editing and it doesn’t matter how incredible your camera is.
What's The Best Camera Angle in Food Photography?
That depends! There are three main options:
Top Down or 90 degree angle
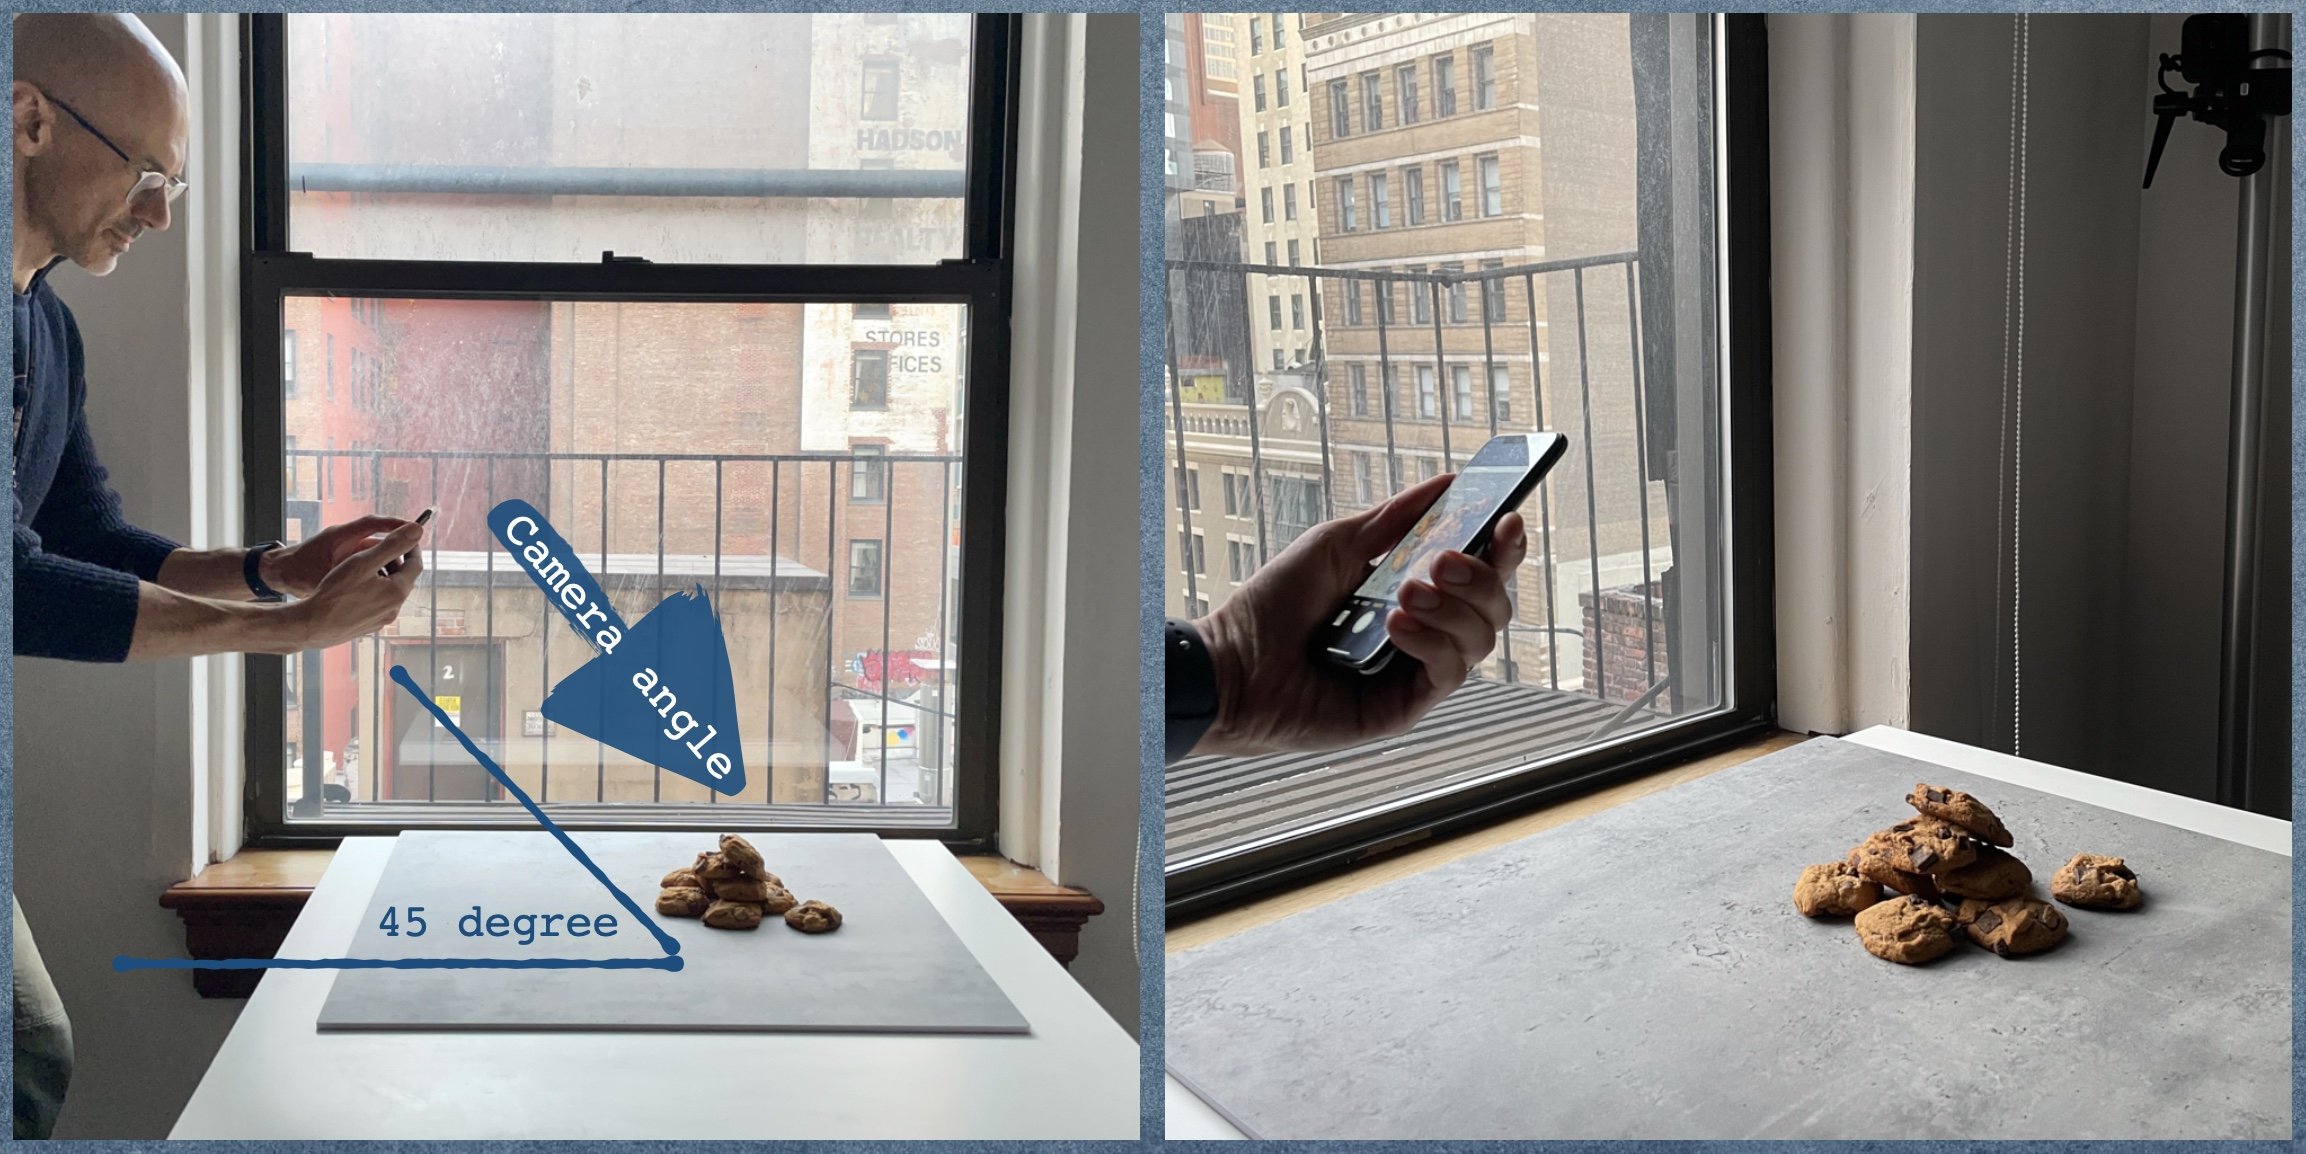
45 degree angle
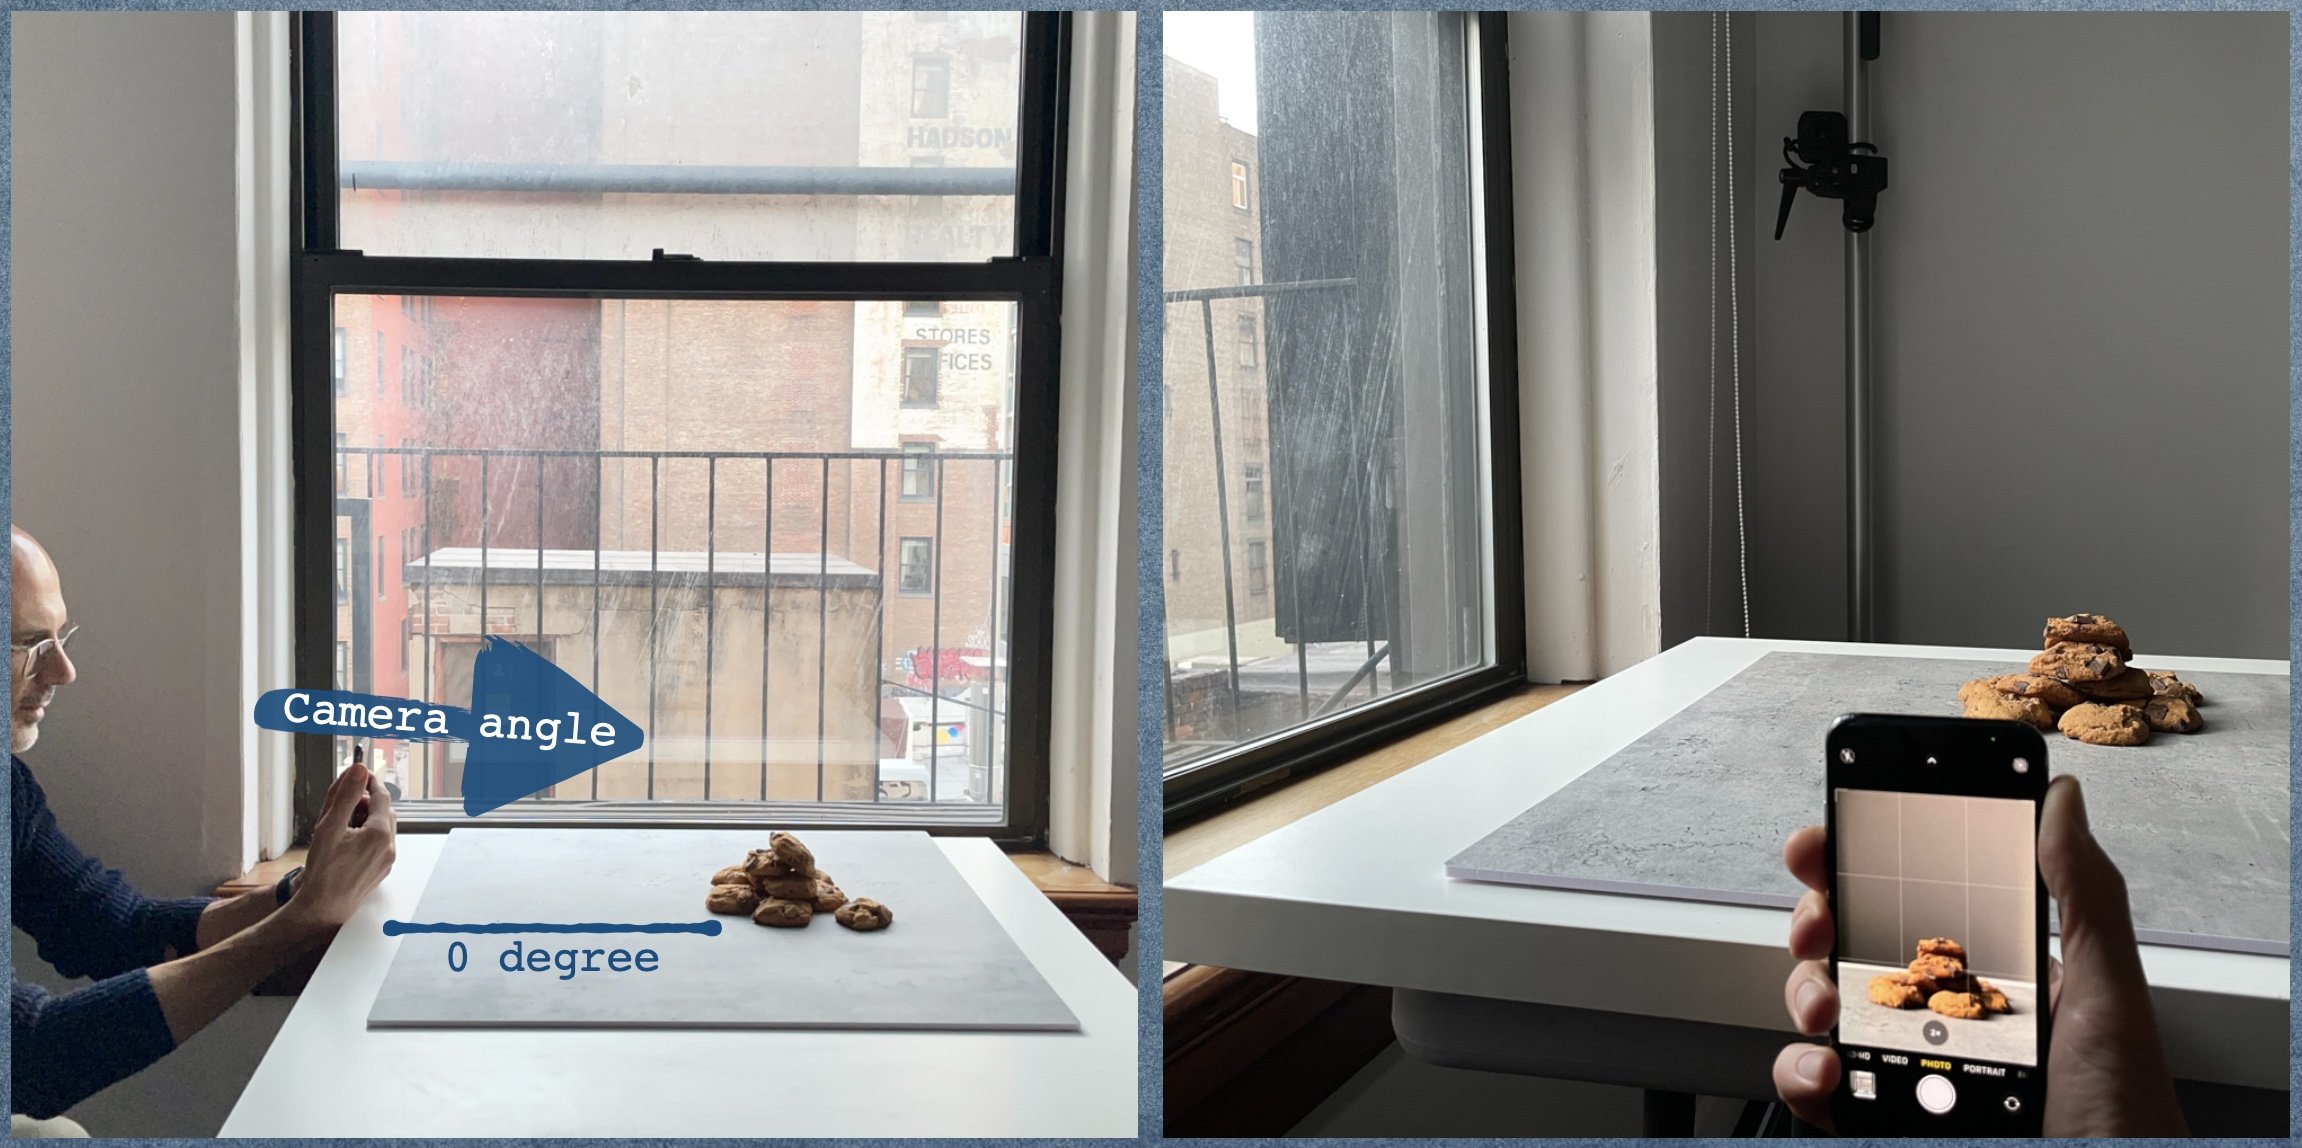
Straight on or zero degree angle
How do we choose the camera angle?
Your job is to find the camera angle that enhances your food subject as much as possible and tells the story you have in mind in the best way possible. That means the camera angle will depend on the food and the story. In other words, there is no straight answer to the question: What camera angle should I use?
That being said, there are guidelines that will help you quite a bit, specially if you’re just starting out and you don’t really know where to start from. So, forget the camera angles and instead start by looking at the shape of the food you want to capture.
Is the food predominantly tall (burger, stack of pancakes, tall cake, etc)?
In most cases, and especially if the food item is the true protagonist of the story (it’s NOT a tablescape with several different protagonists), you should NOT use a Top Down camera angle. If you do, you’re going to miss the height of the food and the food will look flat! You should instead start exploring the angles ranging from 45 degrees or so all the way down to 0 degrees or Straight On camera angle. I want to stress the exploring part of the previous sentence. You need to try and explore as much as possible and you need to observe as many images as possible in order to develop your eye and understand what works and what doesn’t.
Is the food predominantly FLAT (pizza, some soups, slice of bread, etc)?
In this case you can safely exclude the Straing On camera angle and start from the Top Down camera angle and explore the angles all the way down to maybe 45 degrees or so.
Is the food not really tall and not really flat? (pasta, some sandwiches, salads, etc)?
You can start with the 45 degree camera angle and explore moving towards the Top Down camera angle AND towards the Straight On camera angle. In most cases, you’ll end up with best results in the range 25-70 degrees.
We might not have the exact answer to the question above, yet these guidelines should be able to provide you with a pretty good idea of where to start with. I suggest you observe as many images as possible and focus on the camera angles used in those images. Also, more than one camera angle could work in some cases, so make sure you keep exploring, even if you think you’ve become quite good at this.
Hope this helps!
DO YOU NEED MORE HELP WITH FOOD PHOTOGRAPHY?
Join my free newsletter and/or enroll in my Smartphone Food Photography course.
May the right light be with you! ☀️📷😀
NEVER Do This in Food Photography!
One of the most common mistakes in food photography? Using an ON-CAMERA flash.
Have you ever found yourself in a restaurant at night and the light just isn’t enough to show the fantastic food they just brought to you? Yet you really want to take a photo (I know the feeling). So, what’s the most natural (yet WRONG) thing you tend to do in order to take that photo? You turn on the flash on your camera (no matter if we are talking about a smartphone camera or a stand-alone professional camera) and take that photo.
NEVER DO THAT (again)! Please.
The thing is that lighting is by far the most important component when it comes to photography (the other components are: composition, editing and camera). So, all things being equal (subject, composition, props, etc), the difference between a beautiful photo and a mediocre one, is going to be determined by the lighting. In particular, it’s going to be determined by the direction of the light you’re using.
Light coming from the same direction as your camera will result in mediocre (if not horrible) images. And that has NOTHING to do with the actual camera you’re using. The results are going to be nearly identical with a $500 smartphone camera or a $10000 professional camera system.
SO WHY IS FLASH SUCH A PROBLEM IN FOOD PHOTOGRAPHY?
Because the on-camera flash is sitting right next to the camera lens in both smartphones and stand-alone cameras (see images below). That means the light is coming exactly from the same direction as the camera and is going to result in mediocre (if not horrible) images.
Camera and flash in smartphones
Flash on stand-alone camera
JUST LOOK AT THE TWO IMAGES BELOW
Everything is exactly the same when taking these images, except for lighting.
The very same subjects shot with the very same camera from the very same spot look SO different just by the lighting being different! The image to the left is shot using a simple window light coming from the top/top-left corner. The image to the right is shot with the only light being the light coming from the on-camera flash.
Hope this was useful and will make you think twice before blaming yourself (or your camera) for that photo you just took in that dark restaurant with your flash on.
It’s not you.
It’s not your camera.
It’s the lighting that is wrong!
HOW TO CREATE BEAUTIFUL LIGHT FOR FOOD PHOTOGRAPHY?
1) Find a window that doesn’t have any direct sunlight shining through.
2) Turn off all lights in the space where you’re photographing.
3) Never use front light (light coming from the same direction as the camera), see image below.
These three simple rules will take you a long way.
DO YOU NEED MORE HELP WITH FOOD PHOTOGRAPHY?
Join my free newsletter and/or enroll in my Smartphone Food Photography course.
May the right light be with you! ☀️📷😀
Great Food Photography with Just a Smartphone?
I'm back!
It’s been a while. I’m back and happy to start sharing what I know about the art of food photography and the photography business in general.
Many things have happened in the past two years and my photography business went through a major income trouble due to COVID19 that also led to me getting into the biggest rut of my entire creative life.
Things are looking better now and I’m out of the rut thanks to many factors. One of the major factors has been me joining Clubhouse and finding a ton of like-minded (and like-troubled) people that I was able to connect with on a much deeper level compared to any other social media platform.
The connection with an amazing community of artists and business people has nudged me to finishing a project I had started in the fall 2020 and that got totally stuck (due to the rut I was in) this past January. I realized how much help I can offer to the community and I’m currently in the process of finalizing my very first course in food photography that will be available to the general public.
SMARTPHONE FOOD PHOTOGRAPHY is only weeks away from being born and the intention is to help those who struggle with food photography because they lack the means and/or the willingness and/or the time to deal with a camera other than their smartphone. Yes, I want to help the chefs out there, the food bloggers, the foodies, the beginners food photographers, and, in general, those who need help taking great images just with their smartphone.
If you are one of those, I truly hope you’ll join me and you’ll realize how easy it can be to take amazing food images once you have a complete blueprint outlining every single step of the way. I will teach you how to find the best light for your images, how to compose them, how to use your smartphone as a camera and how to edit your images on your smartphone before sharing them on your favorite platforms.
I will also offer a free consultation call if you need any help with your next steps no matter if you’re an aspiring photographer or someone who just wants to be able to take great images with just their smartphone.
Stay tuned and have fun shooting!
When Should You Quit Your Job to Turn Professional Photographer?
Turning pro photographer is as scary as it is exciting and it’s really hard to know when to pull the plug on your other job(s). Some personal thoughts follow and they don’t apply only on food photography, but can be extended to any photography genre or even other types of creative solo businesses.
I think you should not consider letting go of your daily job(s) until all the following three conditions are met. This is of course just my personal opinion and it’s far from being a rule of thumb. More than anything, I believe it’s a good way to start thinking about these questions.
1) Your photography income covers 75%+ of your current cost of doing business (your break even point)
No matter how large the income you get from sources other than photography, I think once your photography generates 75%+ of your break even point across the year, you could seriously consider letting go of your other job(s). So, for example, if your break even point is at $50k on a yearly basis, once your photography business alone makes about $37k, you could consider taking the leap of faith. Please keep in mind that the breakeven point is calculated based on the fixed costs and not the assignment-related costs, as those costs need to be covered by the client on top of your fee and should not play a role in your calculations. See also my other blog post about the CODB.
2) Your net photography income has grown steadily in the past 3+ years
You should have a strong feeling that you can totally make it and that feeling should be backed by a solid trend. Your business is growing, your clients are always very happy to work with you and want to continue to work with you. The longer the trend, the better, of course.
3) You have 12+ months worth of savings at the current standard of living
I think you should have enough liquid money to cover all your expenses for 12+ months without lowering your standard of living. Let’s assume that’s the case and also assume that your photography business is covering only 75% of your total cost of doing business. That translates into having a total of four years available before running out of money (if you only cover 75% of your total needs, you’ll need to take 25% off of your savings every year to fill the gap between 75% and 100%, so your savings will last for four years). In this scenario you would need to be fully covered by your photography income by the end of the fifth year in order not to have cashflow problems.
I had about 12 months worth of savings when I started turning down all the engineering assignments I was getting and dedicated all my energy and resources to making it as a professional photographer.
When Is It Time To Pull The Plug?
It’s really tricky, extremely personal and there are no rules that will guarantee you success. The uncertainties are limitless, in good and bad. The way I see it, you are weighing the satisfaction (and the worry) of feeling that you’re running only on photography versus the frustration (and peace of mind) of still being stuck with your other (boring) job(s). It took me about 6 years to fully transition from engineering to photography. I took my time because I valued the peace of mind more than the fact that part of my income was still coming from engineering.
Needless to say, these are only scenarios and are far from being rules you should live by. As I wrote earlier, it’s a great way of brainstorming about your business and making yourself very familiar with your numbers and what is expected of your business in order to be successful.
Thoughts? Please share your experience with the community by commenting down below. If you enjoyed this information, please share it on your own channels.
Thank You and Happy Shooting!
Why You Need To Master Your Technique. And Do The WORK.
What Is Luck?
According to Seneca, luck is what happens when preparation meets opportunity.
I could not agree more. If you want to make use of the luck you might ‘get’, you need to be ready for it. How do we get ready for it as professional photographers? We master the technique by acquiring all the skills and keep perfecting them. And this process is never supposed to stop, it’s part of our evolution as photographers and artists.
As Steven Pressfield says in the famous book ‘The War of Art’, technique is not a substitute for inspiration and genius, it’s what allows the inspiration and genius to be used to make art once they present themselves. He also suggests that the professional, by working on the technique, creates room for more inspiration to come.
Learning What You Love Is Easy
I believe learning your craft is relatively ‘easy’, because your passion fuels all that effort (if that doesn’t happen to you, maybe there’s not enough passion there) and you enjoy doing that. What is normally more problematic is approaching the other aspects of your business with the same energy in the absence of passion.
The Pros Do The Work
I doubt a lot of photographers have a passion for all those things that a professional photography business requires, yet all those things (bookkeeping, branding, marketing, advertising, networking, outreach, etc) demand so much work and effort. I’d say they stand for at least 50% of the total work needed in order to run a successful photography business. How do we bring ourselves to doing those? By creating a structure and routines in our daily life and that, too, requires a lot of work.
Are you willing to put in the work required? I think it’s an aspect that is very often neglected by amateurs and semipros who are considering transitioning into professional photography. Technique is essential to the professional photographer and we should constantly refine it, but technique alone is not enough in order to turn pro.
Recommended readings:
The War of Art - Steven Pressfield
The Artist’s Way - Julia Cameron
Thoughts? Please share your experience with the community by commenting down below. If you enjoyed this information, please share it on your own channels.
Thank You and Happy Shooting!
Why Being Organized Is Critically Important - Part 1
Are You Organized?
I didn’t use to be, because getting organized is very boring and seems like a waste of time in the beginning, when all you want to do is food photography (or any other type of professional creative endeavor). Yes, it takes a lot of effort to get organized, but do we have a choice? Not really, if we want to become professional photographers. I can assure you that, in the long run, that effort will repay itself so many times over and you’ll be very happy you did that.
When Did I Get More Organized?
When my prospects and clients started to grow in number I realized I wanted to figure out a way to structure and streamline my processes for sending quotes, contract and invoices. You can of course do all this through any piece of software and create a pdf, but it felt better to try and find help through some online platform that was designed just to do that. I’ve been using 17Hats for quite a few years and I find it perfect for my needs. I’m not saying it’s the best one or the least expensive one, I’m just saying it gets the job done and I haven’t felt the need to look elsewhere. So far.
You can do a lot of things with it, including email and bookkeeping. I only use it for:
- Creating and sending quotes
- Creating and sending contracts
- Creating and sending invoices
You can easily create templates for the items above and make your workflow really smooth and fun (as fun as a very boring task can be, at least). I do not use the actual email integration (you could handle all your emailing from this platform if you wanted to), but I do use the functionality for managing the three things when dealing with clients or prospects.
How is this different than sending a pdf attached to an email?
This tool (or an equivalent one, there’s several out there) will allow the following:
- Your clients can electronically accept quotes and sign contracts
- Your clients can pay you electronically both via credit card and e-check/ACH (this option is extremely cheap).
- As the number of invoices you send out increases, it becomes really hard to keep track of payments and this tool gives you total control over that, including the possibility to send payment reminders.
If you’re interested in this tool, check out the tutorials they have created and please do browse around and see if there are other tools you might like better.
Why Is This Important?
Ultimately, this tool not only does make my life easier and more organized, but in particular, it elevates the quality of service I offer, as a professional food photographer. I believe you should continuously (I’d say even ‘obsessively’) aim at offering a service that goes way beyond your amazing food photography and makes you stand out because of the incredible experience people have when they work with you. There are thousands of photographers (pros and amateurs alike) who create incredibly stunning images, but only a fraction of those will deliver an incredible experience to their clients. We should be in that subset of photographers.
Thoughts? Please share your experience with the community by commenting down below. If you enjoyed this information, please share it on your own channels.
Thank You and Happy Shooting!
You Must Track Your Personal Spending
The key to profitability? Know your numbers!
That applies to business as much as to personal spending. In fact, as a solo-preneur, your personal spending and all costs related to you as an individual (things that are not business related) are going to be a pretty large indirect cost for your business in the form of your salary. That’s why you need to know what your personal spending looks like and where your money goes. Check out my other blog post about the cost of doing business.
How much do you spend on the following items on a monthly or yearly basis? I strongly encourage you to take some time and do this exercise.
Food - Clothing - Utilities - Transportation - Vacation - Leisure - Home - Insurance - Etc
I track my personal expenses through this app I’ve been using for years and it works great for me. You can easily customize the categories that are relevant to you and track your expenses by recording each transaction and mapping it into the correct category.
This is extremely useful because it is so easy to just spend money and don’t have a clear idea of where the money went at the end of the month or year. Certain expenses are easier to track because they are fixed, such as rent, insurance, utilities. Others are a lot more variable and those are the really tricky ones, they can add up to a lot of money and that’s why it’s key to keep track of them.
Make it a habit to record your transactions so you know where your money goes and you can make changes to specific areas of your life, if necessity arises. Such a practice is extremely important for photographers and creative entrepreneurs who might have a very unstable revenue stream and need to quickly adapt to changes in order to make it through the rough patches.
Thoughts? Please share your experience with the community by commenting down below. If you enjoyed this information, please share it on your own channels.
Thank You and Happy Shooting!
How To Deliver Your Work
How Do You Deliver Your Work?
https://www.francescosapienza.com - Food and Restaurant Photographer - New York - NYC. Francesco Sapienza is an international food and restaurant photographer based in New York City. Among his clients: The New York Times, Eataly, Lavazza, Union Square Hospitality Group, L'Atelier de Joël Robuchon.
You MUST Back Up Your Work. Always!
What are your backup routines?
https://www.francescosapienza.com - Food and Restaurant Photographer - New York - NYC. Francesco Sapienza is an international food and restaurant photographer based in New York City. Among his clients: The New York Times, Eataly, Lavazza, Union Square Hospitality Group, L'Atelier de Joël Robuchon.
How To Write a Quote
Quotes are really important and this is how I normally structure them.
https://www.francescosapienza.com - Food and Restaurant Photographer - New York - NYC. Francesco Sapienza is an international food and restaurant photographer based in New York City. Among his clients: The New York Times, Eataly, Lavazza, Union Square Hospitality Group, L'Atelier de Joël Robuchon.
5 Reasons Why You Should Use Capture One Pro for Tethering
I Think Capture One Pro Is The Best Tool For Tethering
https://www.francescosapienza.com - Food and Restaurant Photographer - New York - NYC. Francesco Sapienza is an international food and restaurant photographer based in New York City. Among his clients: The New York Times, Eataly, Lavazza, Union Square Hospitality Group, L'Atelier de Joël Robuchon.
How To Price Your Work ... DO NOT Charge by the Hour!
My view on how food photographers (and artists in general) should price their work. Pricing by the hour makes no sense!
https://www.francescosapienza.com - Food and Restaurant Photographer - New York - NYC. Francesco Sapienza is an international food and restaurant photographer based in New York City. Among his clients: The New York Times, Eataly, Lavazza, Union Square Hospitality Group, L'Atelier de Joël Robuchon.


